
PCB, filtering, ground bounce, software, etc.
Your task
Today, R&D engineers face challenging time-to-market goals. Extending the product development schedule and delaying the product launch can prove to be extremely costly in terms of lost opportunity and lost market share. A significant number of products fail EMC compliance the first time. Every day spent debugging, isolating and correcting the EMI problem increases the time to market.


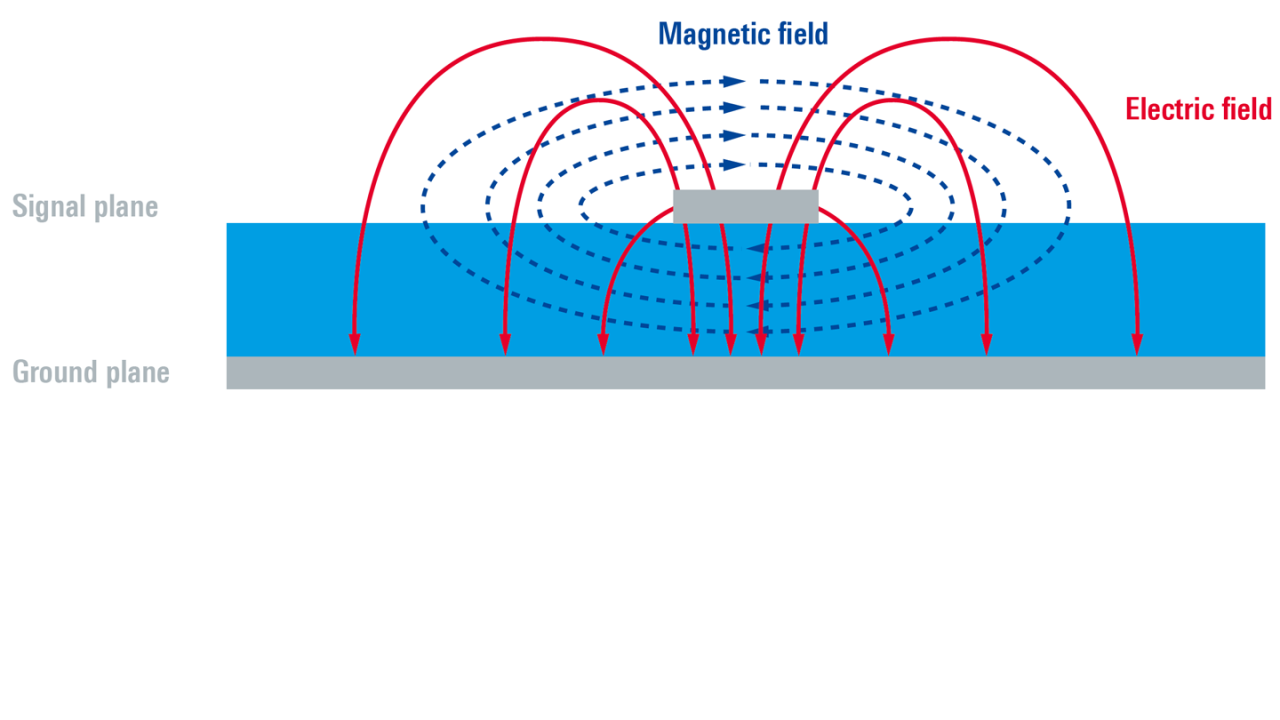
Magnetic and electric field lines on a typical microstrip line
Rohde & Schwarz solution
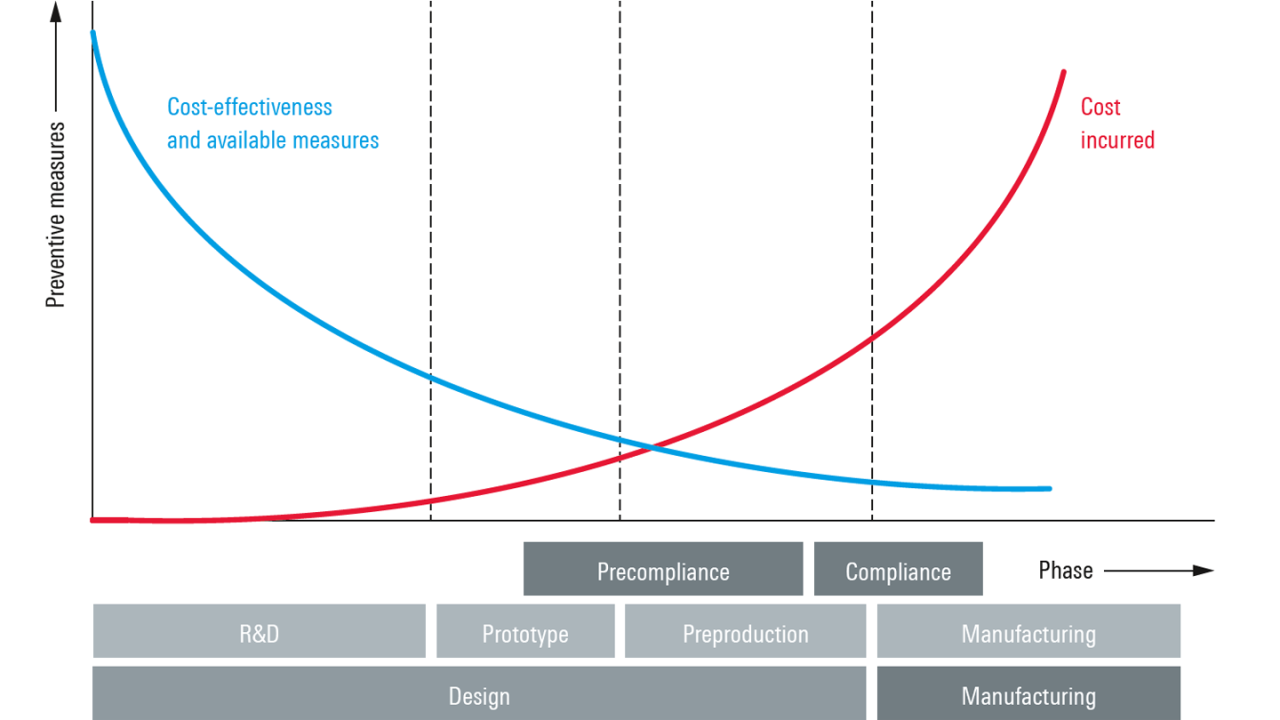
To address these challenges, it makes sense to perform EMI tests during the product design cycle. This will increase the probability of passing the EMC compliance test, which is typically performed at the end of the product development cycle. As illustrated, the cost of fixing EMI problems late in the development cycle can prove to be more expensive than doing so earlier. Preventive measures integrated into design cycle checkpoints can help avoid costly project delays. A great example are switched-mode power supplies. In designs where switching power supplies are involved, thorough testing is required. The combination of high power and current being sharply switched on and off has a lot of potential for EMI.


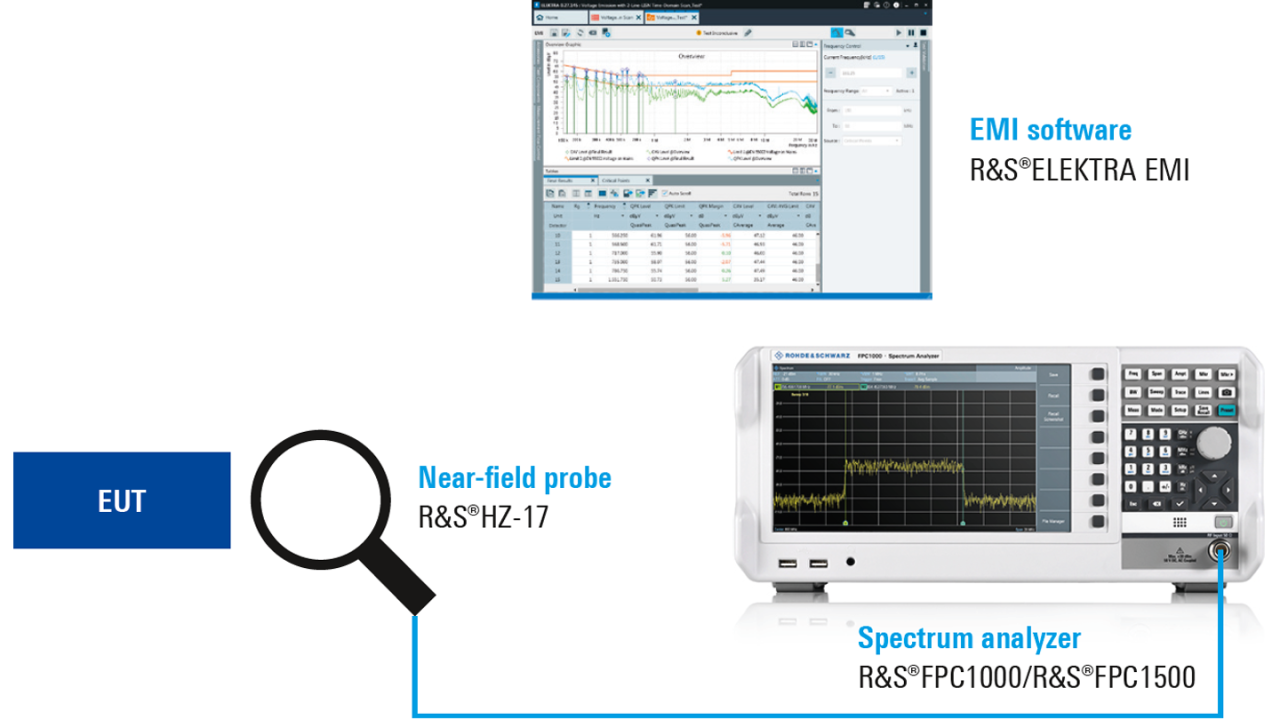
Radiated emission setup: Radiation emission testing uses near-field probes for detection. This setup uses H-field probes to measure EMI radiation from the EUT.
Radiated emissions
Radiated emissions are inherent to any electrical circuit. Radiated emission testing measures the electromagnetic field strength of unintentional emissions generated by your product.
Easy setup
Only a few steps are needed for an EMI debugging session:
- Connect a suitable R&S®HZ-17 near-field probe to the R&S®FPC1000 or R&S®FPC1500 analyzer RF input
- Move the probe over the board or module under test
- The R&S®ELEKTRA EMI software (R&S®ELEMI-E) provides an easy way to document the findings
R&S®HZ-17 contains two probes. The larger ring type probe features excellent gain and is good for overview measurements. The small probe has a pin-type tip. It has good gain and is excellent for spatial resolution down to the board trace level. With either probe, please consider polarization as shown in figure below. Field lines must be vertical to the probes receptive area.
The relevant frequency range for radiated emissions is 30 MHz to 1000 MHz to measure high frequency interference caused by switching transients < 1 μs.
Based on component selection or prior measurements, the designer may already know critical frequencies of the board or module under test. Frequency and span have to be set accordingly on the R&S®FPC. Limit lines can be used for pass/fail indication on the display and to easily monitor improvements after EMI design optimization.
Non-final setups on the lab bench with open printed boards may cause coupling problems at high frequencies that will diminish once the boards are mounted in metal enclosures and have an optimum ground connection.
Mitigating measures on switched-mode power supplies
Should the EUT exceed emission limits, consider optimizing the PCB layout (i.e. shorten traces, avoid coupling) or active testing (i.e. component selection based on their measured emission).


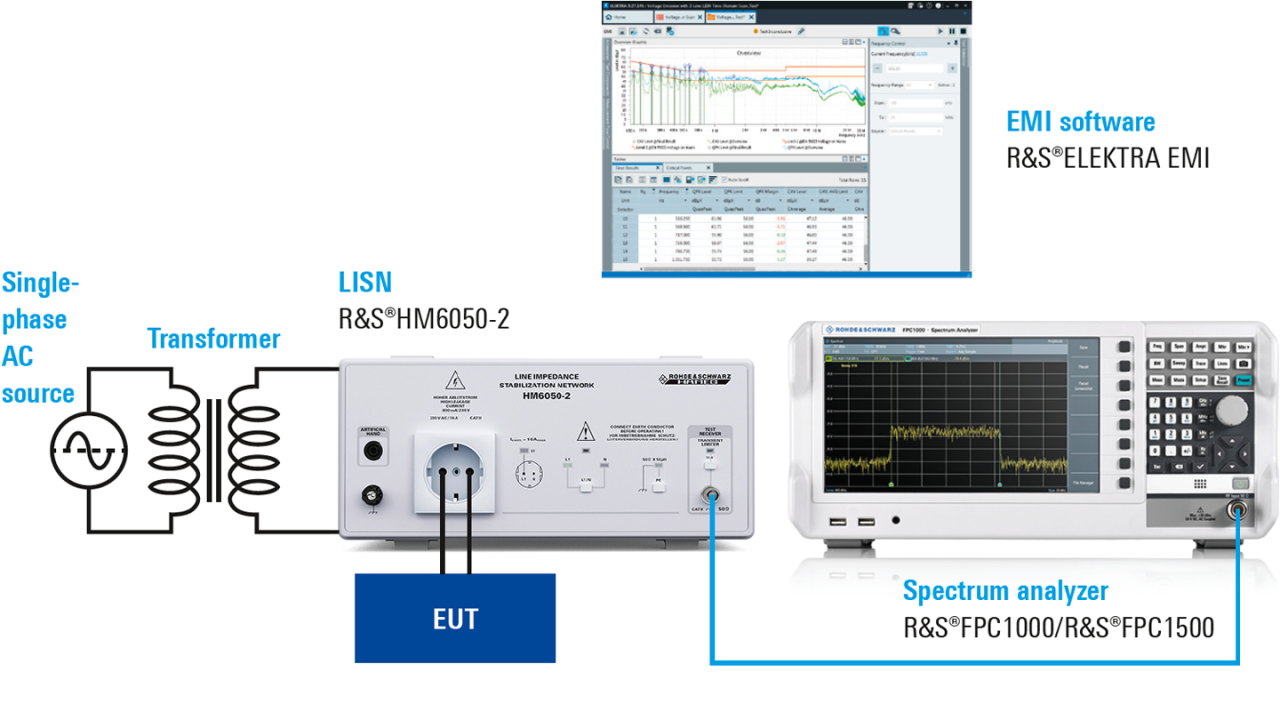
Conducted emission setup
Conducted emissions
EMI measurements comprise not only radiated emissions, but also conducted emissions propagating towards the mains supply. This requires the RF signals to be separated from the mains supply and stabilized to 50 Ω. This is achieved using a line impedance stabilization network.
The lab is inevitably a noisy and constantly changing electrical environment. A reference ground plane is required for repeatable measurements. Using a shielded chamber is helpful to avoid reception of ambient signals.
Easy setup
Rohde & Schwarz provides a simple solution for conducted EMI measurements.
Connect the R&S®HM6050-2 LISN to the
- Mains supply via an isolation transformer
- EUT
- R&S®FPC spectrum analyzer via BNC cable
- PC running R&S®ELEKTRA EMI (R&S®ELEMI-E) using a serial/USB adapter cable for line switching and a LAN connection to the R&S®FPC for remote control
Once the instruments are set up in R&S®ELEKTRA EMI, they are controlled via the software with preconfigured measurement setups in a simple “push play” manner.
Overview measurements performed with the peak detector and the parallel average detector in the 150 kHz to 30 MHz frequency range produce fundamentals and harmonics of the switching frequency.
Since the measurement is performed initially only with the setting to phase L1 or to phase N of the LISN, it is necessary to determine whether the amplitudes of the other phase are higher. In some cases, the test sequences have to be repeated several times.
Mitigating measures on switched-mode power supplies
Should the EUT exceed emission limits, consider optimizing the switching PSU layout (shorten traces, avoid coupling, optimize GND connections). Ferrites may help as well, however this requires a good PCB design to start with. Additional shielding is another, typically expensive, option.


