Import and export of data and settings via USB cable
With the R&S®RTB2000/RTM3000/RTA4000 oscilloscopes, you control and interact remotely via LAN. These oscilloscopes incorporate the USB-based connectivity standard media transfer protocol (MTP).
With the R&S®RTB2000/RTM3000/RTA4000 oscilloscopes, you control and interact remotely via LAN. These oscilloscopes incorporate the USB-based connectivity standard media transfer protocol (MTP).
Connect the USB type B device port on the rear of the oscilloscope to a PC USB host port and use the following features:
MTP is used to transfer files from portable devices, e.g. from the R&S®RTB2000/RTM3000/RTA4000 oscilloscope to a PC via USB cable. The protocol lets you access photo and audio contents and other media when the device is plugged into a PC’s USB port. MTP is part of the Windows Media framework. In 2008, the USB Implementers Forum included MTP as part of the USB specification.
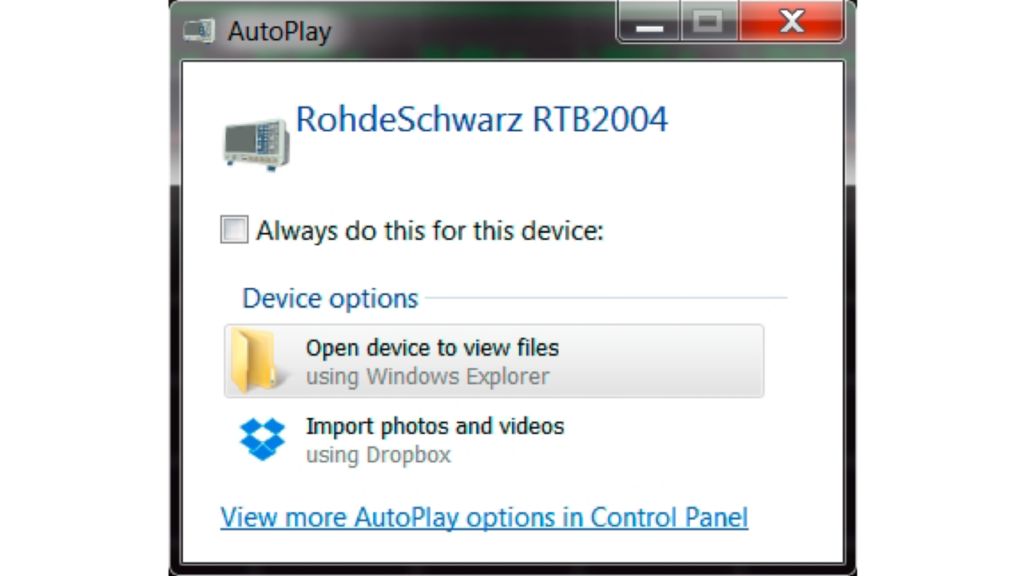
Connect your PC to the R&S®RTB2000/RTM3000/RTA4000 via a USB cable. The PC’s USB host port (type A) connects to the USB device port (type B) on the rear of the oscilloscope. Similar to a popup message that appears when connecting a mobile phone to a PC, the PC shows a popup message asking if you would like to connect to the oscilloscope.
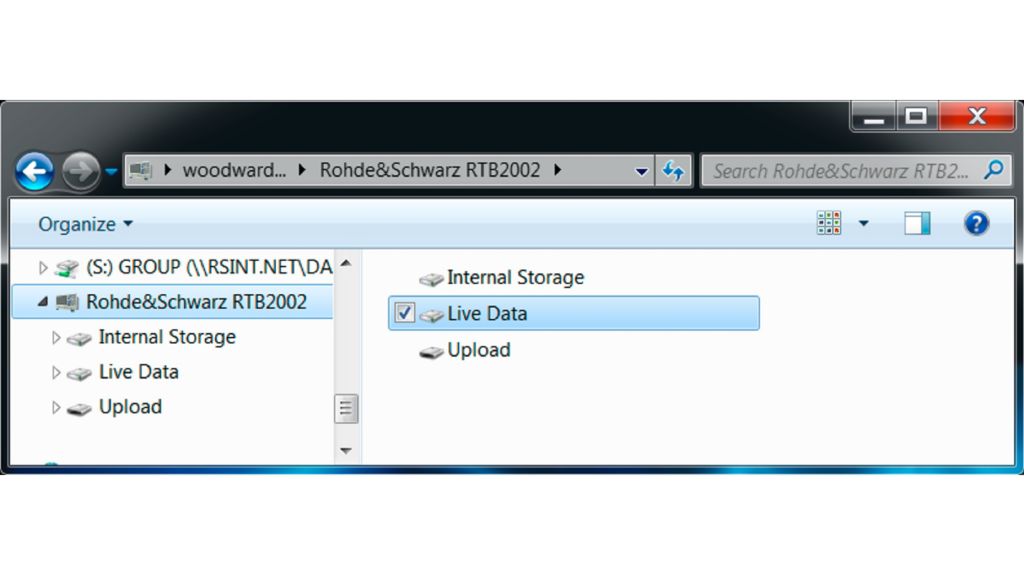
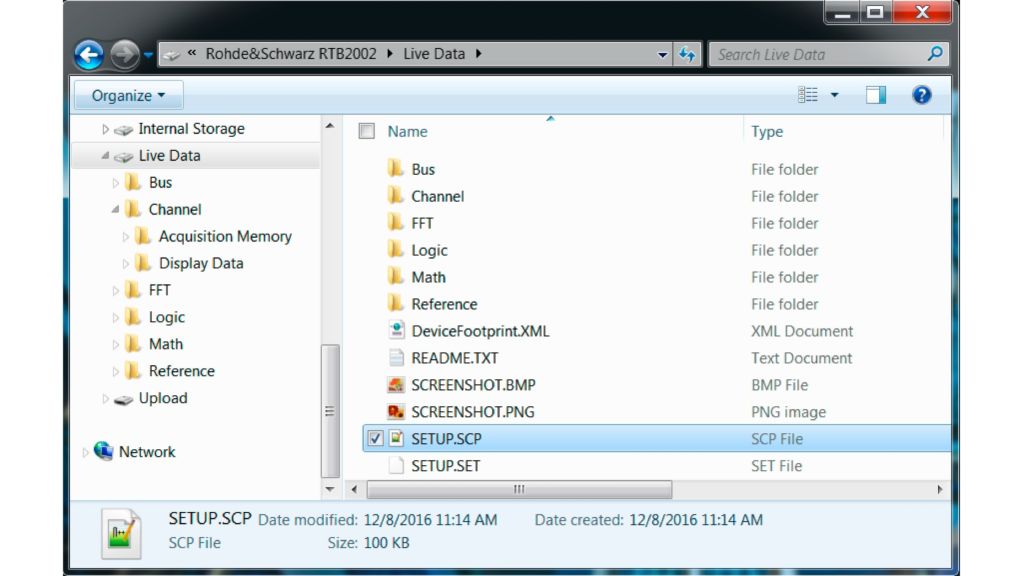
Then the primary directories (internal storage, live data and upload) appear.
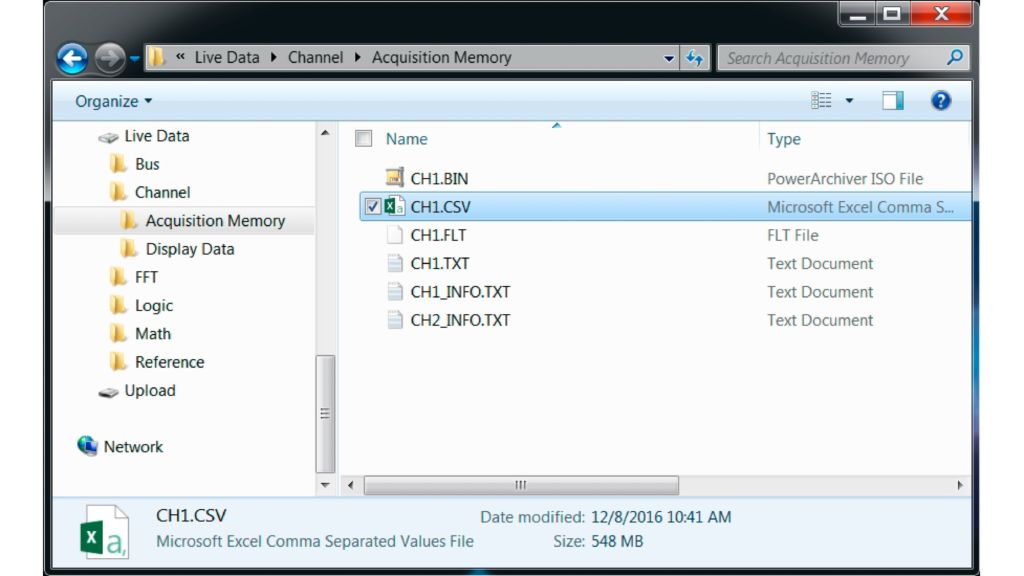
Click on Live Data ▷ Channel ▷ Acquisition Memory to access the oscilloscope’s waveform data (.csv files). These files can be saved and opened directly in Excel or other PC-based analysis tools.
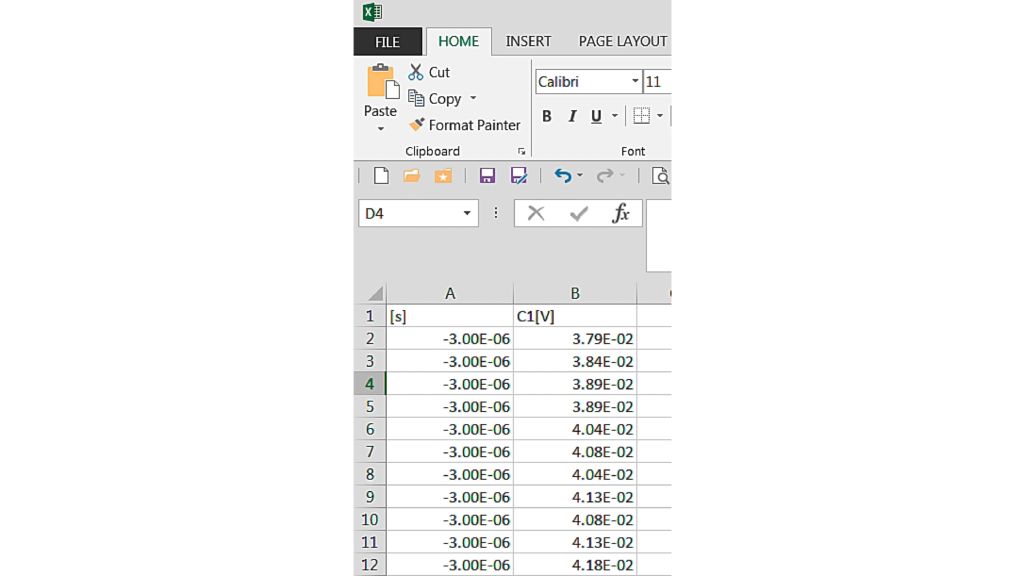
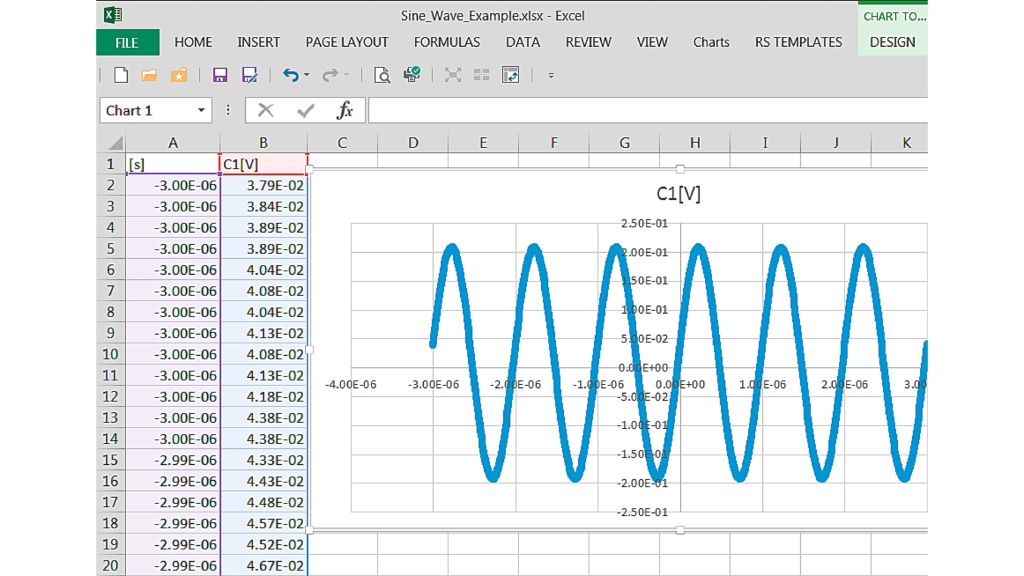
In this example, the oscilloscope captured a sine wave. The CH1.csv file was copied onto the PC and opened in a spreadsheet. Column A shows the timestamps when each oscilloscope sample was acquired; column B contains the vertical value associated with each capture.
Use the spreadsheet to plot the data or to perform further analysis. Each source has a separate .csv file that includes channels, math and reference waveforms. Using the directory, users navigate to .csv files containing the entire acquisition memory or the data that is displayed on the oscilloscope. Some PC-based tools (e.g. Excel) support a limited number of rows and will not be able to process deep memory acquisitions made by the oscilloscope. In this case an application that supports more data is recommended, for example MATLAB® or Octave.
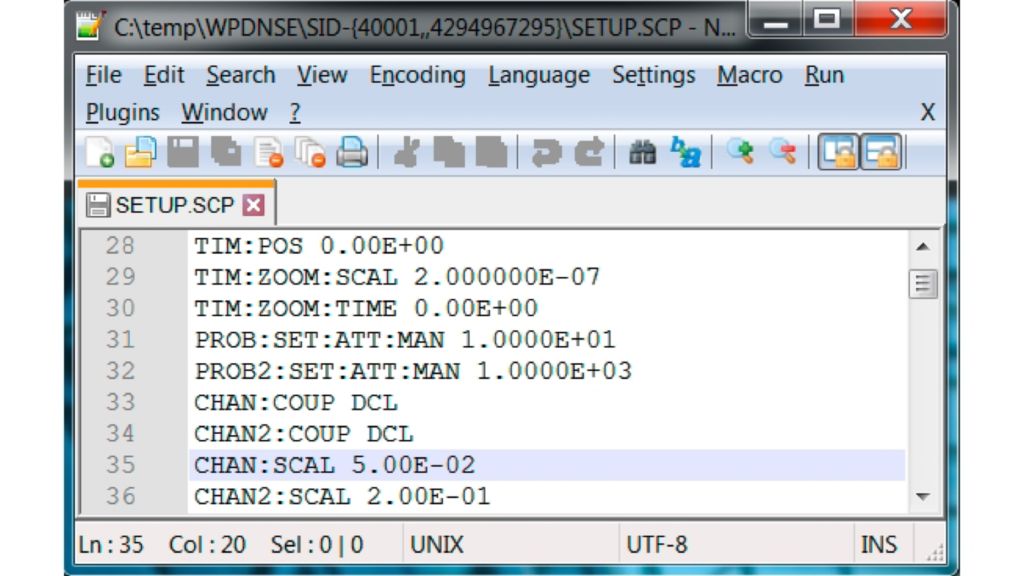
The live data directory includes a SETUP.scp file for users who want to determine current oscilloscope settings and associated SCPI commands. Open this formatted text file to view the SCPI commands. Then copy the file to the PC and open it with a text viewer.
The screenshot shows an example with a subset of SCPI commands associated with the oscilloscope’s current settings. If needed, the oscilloscope’s user manual (1333.1611.02) helps with the interpretation of each command.
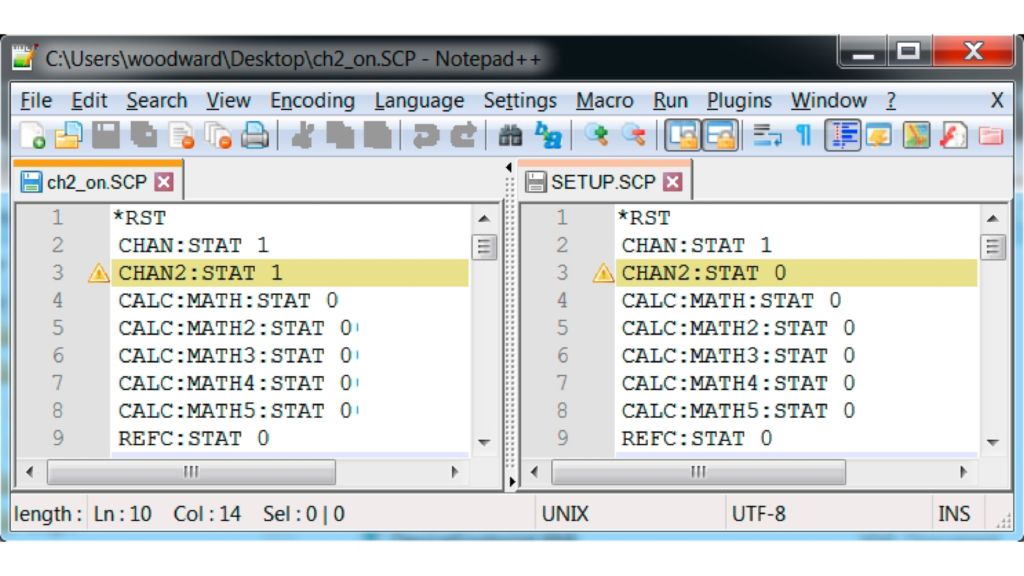
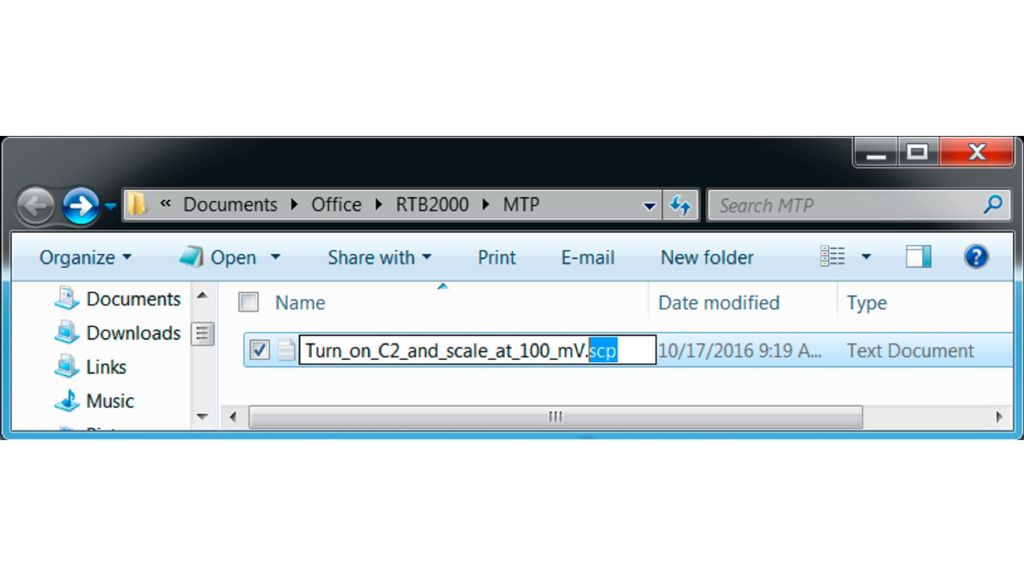
If you cannot find the user manual or if you need to find out the SCPI command associated with a change to one of the oscilloscope’s settings, open the SETUP.scp file. Change a setting using the front panel or user interface. Then open the new SETUP.scp file and compare both files. The SCPI command for the changed setting will be highlighted. This example shows the SCPI command that will turn on channel 2.
If you need to send an SCPI command to the oscilloscope, you can use:
to create a text file with the desired SCPI command(s). Create a file with the command to turn on channel 2 and adjust to 100 mV per division; the text file will include, for example, CHAN2:STAT 1 and CHAN2:SCAL 100E - 3.
Simply save the file as .scp or change the file extension from .txt to .scp.
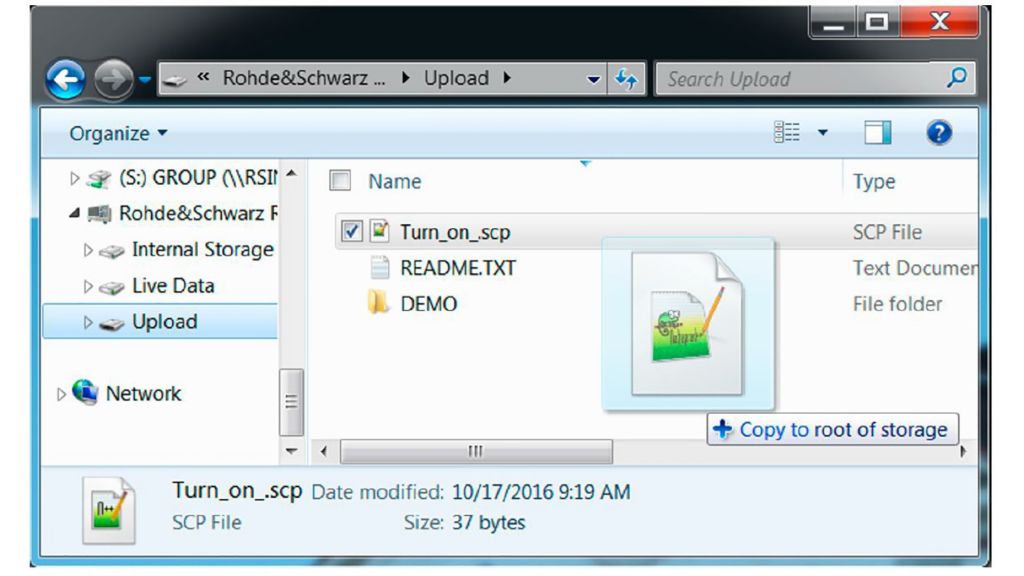
Copy the .scp file with the SCPI command(s) and drop it into the upload directory. The SCPI command(s) in the file will be instantly executed on the oscilloscope.
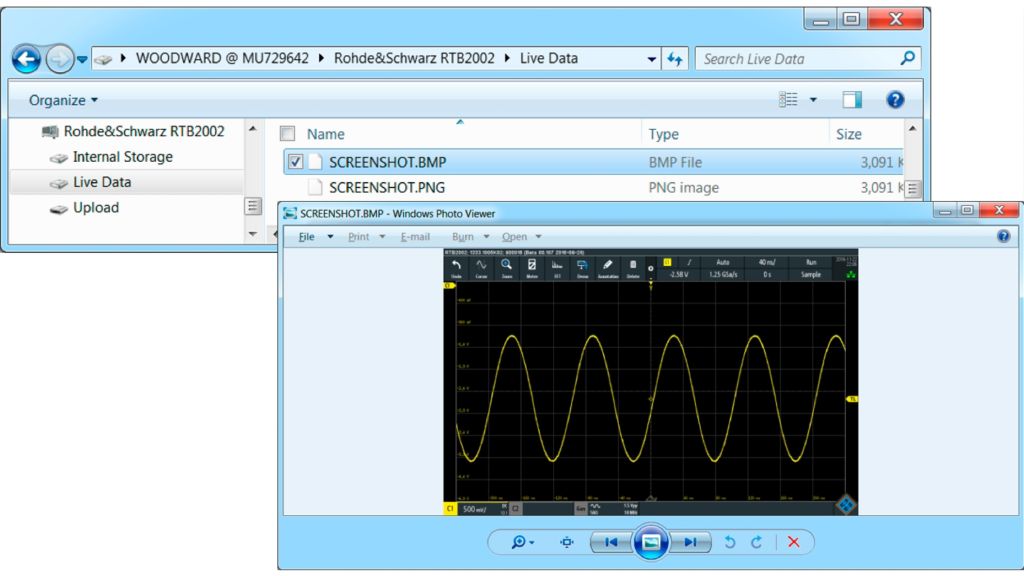
If you would like to capture an oscilloscope screenshot without saving files to a USB drive on the oscilloscope front, just switch to live data directory and open or copy a bitmap of the current image on the oscilloscope display.
If you have downloaded a new version of the firmware onto your PC, drag & drop it into the upload directory. The oscilloscope immediately starts the firmware update.
Related products